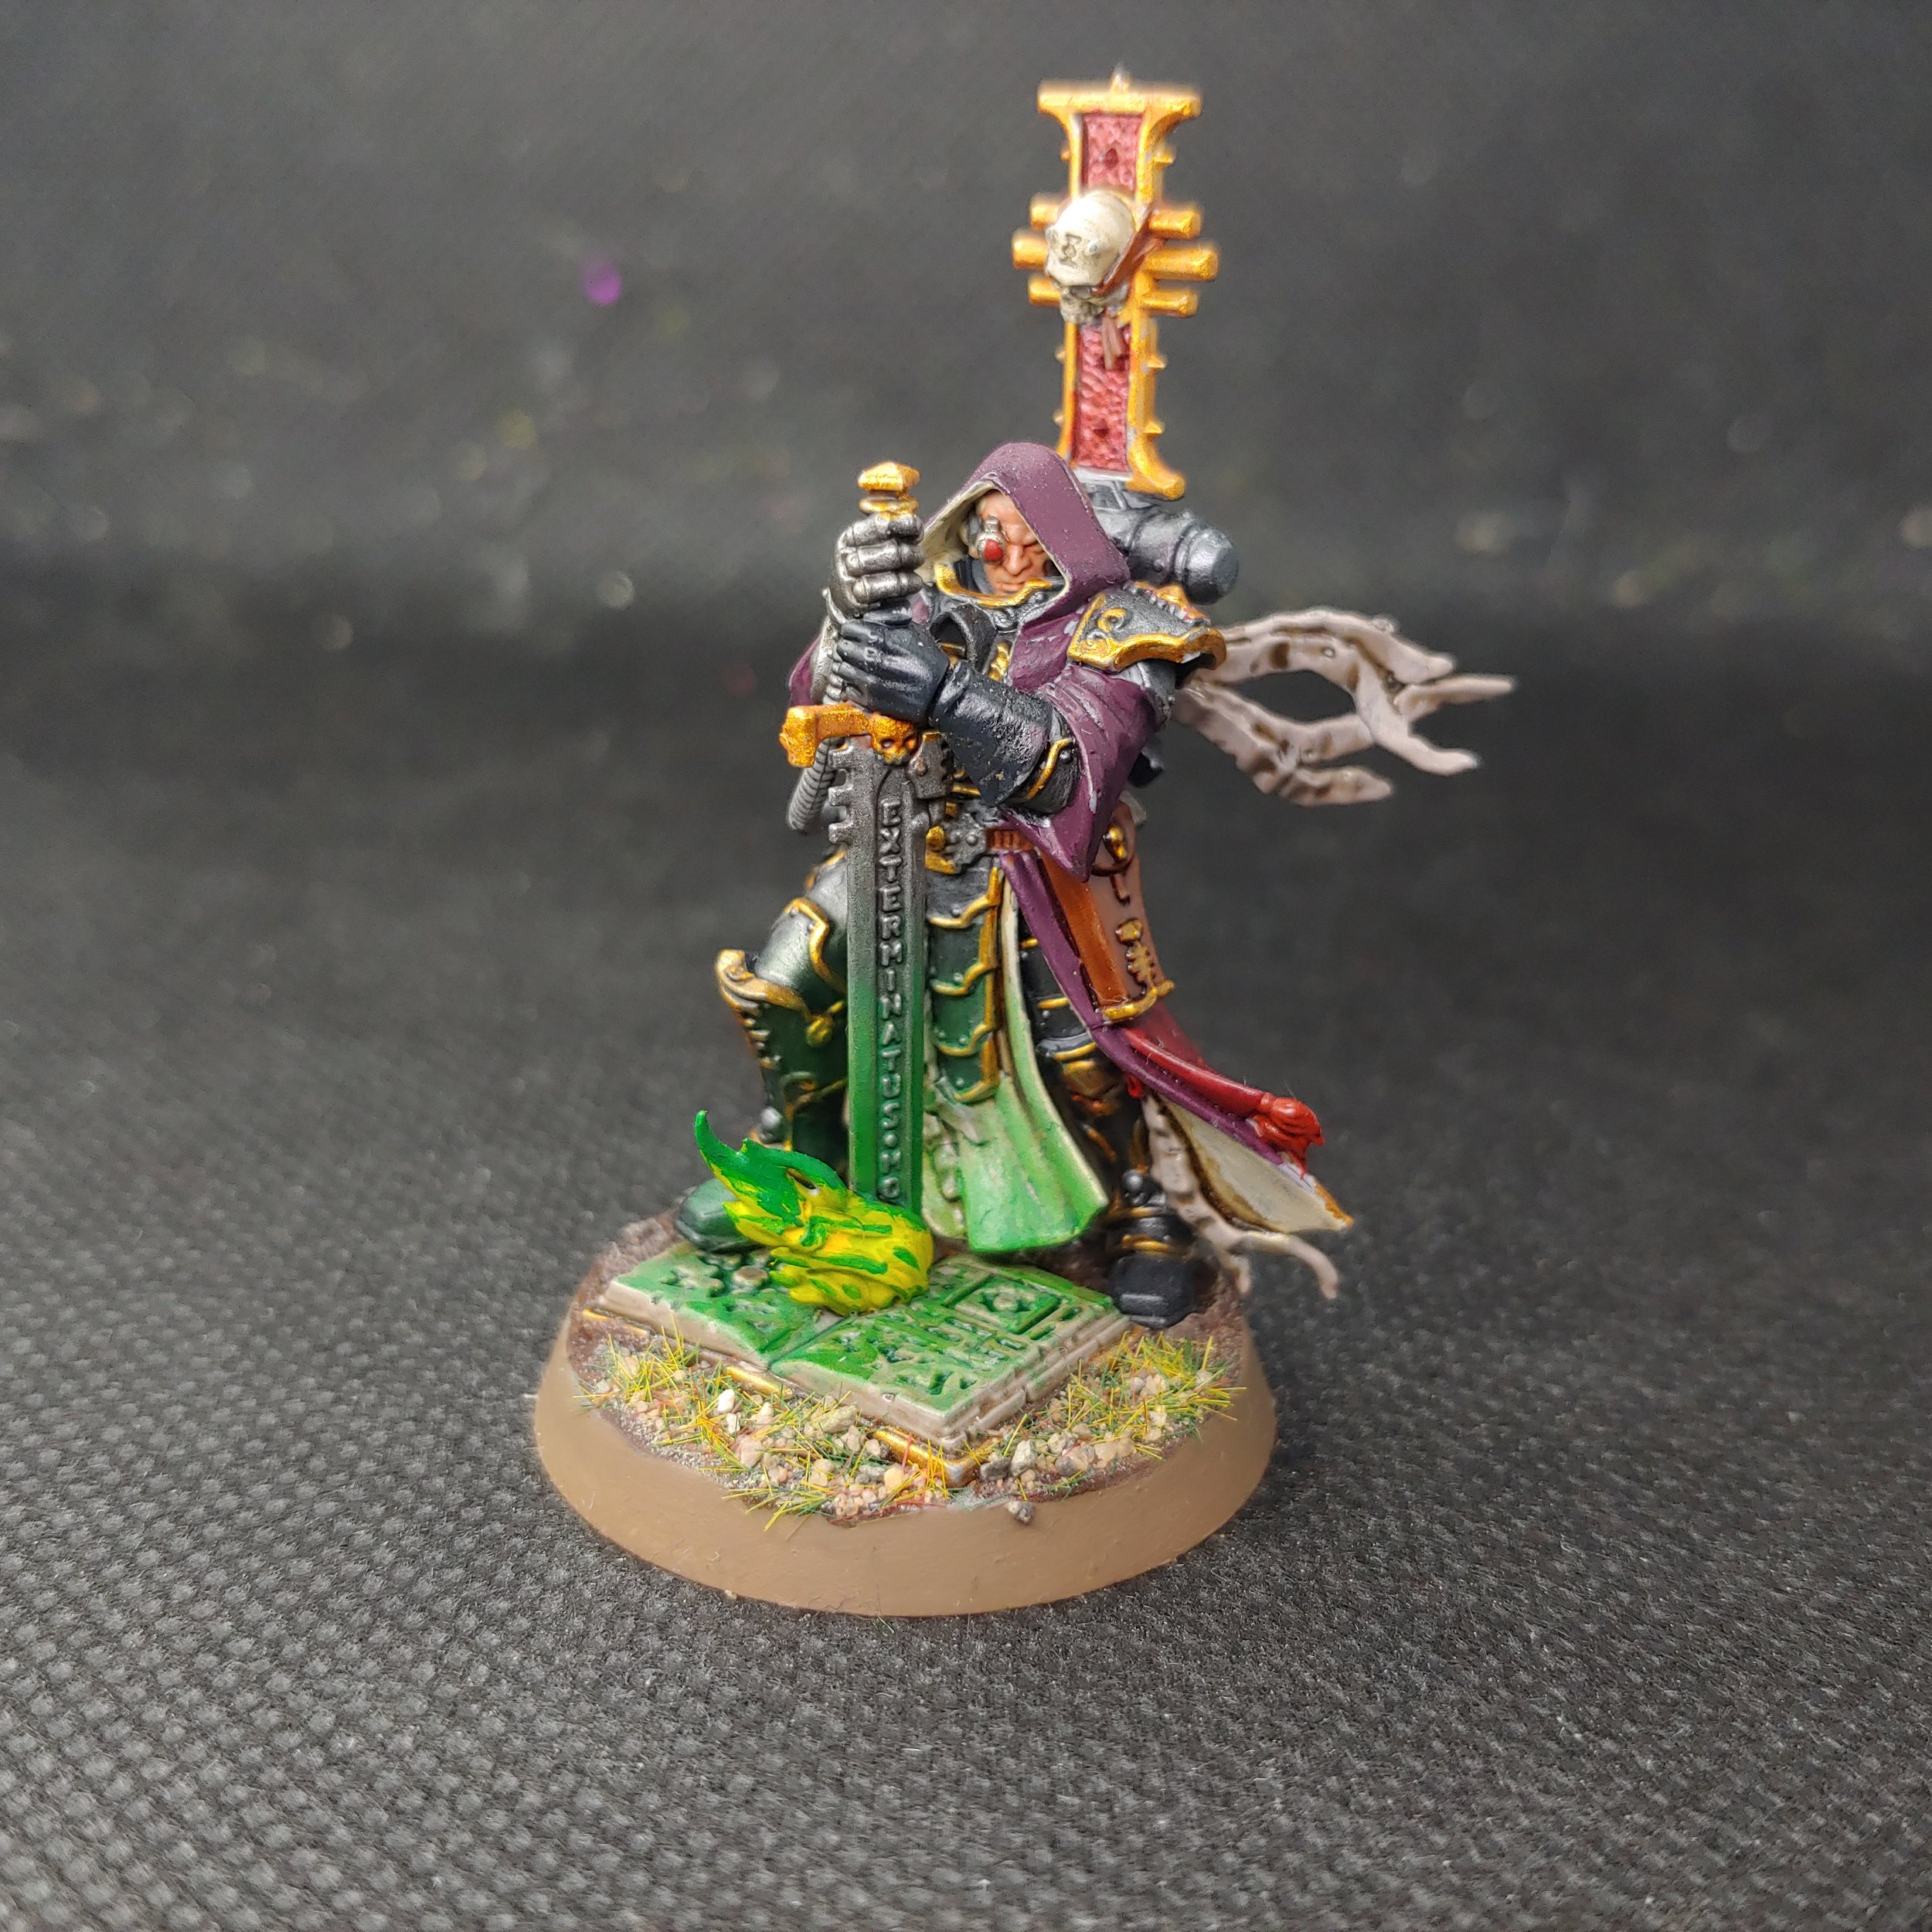
Warhammer 40,000 - Inquisitor Erasmus Cartavolnus
In my end of year article I mentioned that I had accumulated quite a few of the Commemorative Series of models over the last couple of years. I decide I should probably make a start on them lest they start to overrun the house. I gravitated towards Inquisitor Erasmus Cartavolnus as he looked quite fun to paint, that fire at the base of his sword would be the perfect chance to practise some object source lighting.
With that in mind I set to clipping him off the sprue and putting him together. For ease of painting, I glued the sword and book to the base and left the body separate. Otherwise it would be a nightmare getting to all the detail on his chest. And with that done, I primed him grey.
I started with the hardest to reach area, his face. I painted this with a few thin coats of Cadian Fleshtone. Continuing to work from the inside out I then painted the inner lining of his cloak with Army Painter Skeleton Bone. How the outer lining for the cloak I figured a nice rich burgundy colour would look great, to really show off the prestige of being an Inquisitor. Unfortunately, I don’t have a burgundy paint but it was easy to make one with two parts Screamer Pink to one part Corvus Black. To finish off the cloak I painted the trim around the base with Scale75 Dwarven Gold.
Continuing with the metallics, I painted all his bionics and the blade of the sword with Leadbelcher. For the armour I went with Scale75 Black Metal, it’s actually black and more of a dark grey but it was suitable for my needs. Like the cloak I painted the trim of the armour with Scale75 Dwarven Gold. The sword hilt and the Inquisition icon on his backpack I also painted gold. The middle part of the icon I then gave a coat of Blood Angels Red contrast paint to give it a nice metallic red colour.
For the remaining details I painted his gloves and boots with Covrus Black, the parchment on the purity seals I painted with Two Thin Coats Griffon Claw and the wax seals with Mephiston Red.The pages of the daemonic book I also painted with Two Thin Coats Griffon Claw, the colour with Mournfang Brown and the clasps on the corners with Scale75 Dwarven Gold.
By way of washes, pretty much everything got a coat of Nuln Oil, except the face and gold which was washed with Reikland Fleshshade and the book and skull which were washed with Army Painter Strong Tone. After which I did a bit of layered on the inside and out of the cloak using the original basecoat colours. And also on the skulls and parchment using Army Painter Skeleton Bone and Two Thin Coats Griffon Claw respectively.
I didn’t go too crazy with the highlights as I was keen to move onto the OSL. First things first though I need to paint the little daemonic flame. I started by basecoating it with a few thin coats of Yriel Yellow. Next I started building up layers by mixing it with progressively more and more Warpstone Glow until on the very tips of the flames I was using pure Warpstone Glow. For the OSL effect itself I heavily thinned some Warpstone Glow, and took a little bit of it onto my brush, I could then apply a thin and transparent layer of paint that wouldn’t pool in recesses like a wash. With a few applications I was able to build up a green tint on the sword blade, and the Inquisitor's leg and tabard. Eventually I realised that although I was thinning the Warpstone Glow to a transparent consistency, it’s still an opaque paint and with enough layers it would start to obscure details. So I switched to Warp Lightning contrast paint, which by its nature is transparent. Again I thinned it and applied the paint in very thin layers. The overall effect was alright, not bad for my first attempt all things considered. It looks good on the Inquisitor but not so much on the book, as I didn’t really get much of a gradient. Especially close to the flames where the light would be the brightest.
Temporarily satisfied with how it looked I moved onto the base. And to be honest, there wasn’t all that much to do; the book covered most of it and the Inquisitor is standing over most of the rest of it. So I slapped down some Vallejo Brown Thick Mud, once that was dry I washed it with Army Painter Strong tone before drybrushing it with Tyrant Skull. Finally, I blobbed on some PVA glue and sprinkled on some Geek Gaming Scenics Base Ready Patchy Plains.


